AB Testing in Sitecore 8.1 and Workflows

In Sitecore 7 series, it was possible to create AB tests  for components and have them deployed independently from the workflow associated of the page where they were applied. With Sitecore 8 a component level AB test needs to be approved within the page workflow to be properly started.

The interface for Sitecore 7.5 had the following buttons on Page Editor for starting or stopping a test:

sc7

The new interface for Sitecore 8.1 Experience Editor doesn’t have the Start Test/Stop Test buttons:

sc8

In order to have the test started you must submit the item in the worflow and then select “Approve with Test“.

workflow

One thing that was possible to do with Sitecore 7 was to go directly to the test item in the content tree and hit “Deploy” in the Review tab. That would also start the test. However, if you try to do the same in Sitecore 8 then your component test will simply not work. You actually need to go through the wizard to make it work.

Here it is the wizard:

Capture

To know more about it I recommend reading this very good post by Jonathan Robbins, it explains really well these parameters and also the difference between component level, page level and content testing in Sitecore:

http://jonathanrobbins.co.uk/2015/07/28/sitecore-8-content-testing-creating-multivariate-and-ab-tests/

And that’s the lesson for today, sometimes you shouldn’t try to use Sitecore 8 the same way as Sitecore 7 but look into the specifics for that version.


The fable of Phase 2

An online discussion I had today with fellow Sitecore MVPs and enthusiastic Sitecore folks led me to write this post.

All started on website projects that are not ‘DMS-ready’ or ‘DMS-friendly’, meaning Sitecore implementations that have not considered the possibility of the client making use of digital marketing (DMS) features available in Sitecore such as campaign management, personalization and A/B or MV tests.

The non-DMS-friendly, hard coded big rich-text editor projects

Such projects do require a lot of rework just to get to the point of being ready for using DMS. But nowadays we can definitely argue that most Sitecore projects implemented by professional Sitecore partners take “by default” such consideration and they are ready to enable digital marketing features. However, in most of them these features are marked as “Phase 2”. A phase 2 left of on the realm of planned ideas, a desired state that so far seem to be not materializing on most cases. And why that?

littlegirl

First of all, why is it a phase 2? That’s the first question I had. Is it because partners are not ready to implement a solution that can right from the go-live date make full use of Sitecore digital marketing features? Is it because clients (Sitecore license holders) don’t have resources aligned and prepared on their end to use it? Or is it because each side doesn’t have yet a clear understanding of what and how can Sitecore digital marketing features actually be used to achieve the key online goals of a company’s web presence?

I believe the answer is on lack of understanding of each other and also on some cases the lack of content and marketing strategists involvement during the requirements, planning and implementation phases of these projects.

Even DMS-friendly projects can fail

The lack of understanding I dare to say is mostly on the technical side of the project. Implementation folks (Solution Architects, Developers, Software Engineers, etc.) tend to believe that everything can be solved with just appropriate training of the “users” (these mythical creatures that will do everything to break the beautiful code we had put together). The code and the interface we created is wonderful! Everything was unit-tested, we did it all on agile sprints where all user stories were discussed, properly estimated and implemented with the latest frameworks available. We had CI, QA, UAT, and also a lot of other acronyms! It is all there properly implemented following best practices and the users can make good use of it or decide to ignore it and not to use it at all, “it is their call!”. And that (ignoring it) is what is happening on most cases.

So, I am saying that the lack of understanding is mostly on the ‘techie’ side, but it is not only there. A veiled resistance comes from the marketing folks too. They fear the use of the new tool, a tool that they  don’t completely understand and it seems it was implemented in a way that also doesn’t understand them. The moment they realize that it will be something outside their comfort zone it is easier for them to agree with postponing it to phase 2. And leave it there! And you guys on the development side feel free to jump to phase 3 first and come back to phase 2 later, no rush OK? Sounds like a plan?

The brigde

Can we build that bridge on Sitecore implementations? A bridge for linking and bringing together the people that is working running the marketing campaigns for our clients and the Sitecore implementation teams on partner, can we do that? The answer is yes, we can! We know that both sides are really smart and good on what they do. They may speak different languages but knowledge sharing and some translation in the middle is part of an education process that is healthy for both. We have a lot to learn from each other and working as a team on these projects is key to make it happen.

“There’s been an awakening. Have you felt it?”

My goal for this year (2016) is to work on that bridge. To get even more into the roots of the technical side of Sitecore digital marketing features but most importantly, to be able to understand and articulate the needs of the marketing folks and, by doing that, figure out what needs to be done in our implementations to make sure phase 2 will actually happen, and if possible not as phase 2 but as a crucial part of phase 1 of our projects. If that means crossing the bridge from being a Technology MVP with Sitecore to become a Digital Strategist one I am willing to go for it. Starting now I will be sharing more on that side over here. So let the ride begin!


Define the Key for Dynamic Placeholders

One of the issues I had with Sitecore dynamic placeholders implementations available on the community was the fact that or they would have keys automatically generated using unique identifiers (GUIDs) or they would use an arbitrary numerical sequence.

The issue with the first one is basically a non-user-friendly placeholder key showing up in your presentation details, making it harder to identify which one of the dynamic placeholders was actually being used by a component.

The issue with the second one is that it defines the placeholder keys during rendering time following a numeric sequence. Therefore you would have something like placeholder_key_1, placeholder_key_2, placeholder_key_3. The problem here is that if you add components to placeholder_key_3 and then after if you decide to delete placeholder_key_2, the next time the page is rendered you would end up with your key_3 becoming key_2 (as it is now the second one and not the third one anymore) causing any components added to key_3 to simply disappear. Your content would still be there but on components that are assigned to a placeholder key that is not valid anymore.

To solve that problem I decided to change the implementation to generate the key by appending a suffix defined on a rendering parameter from the component holding the placeholder.

Using an implementation based on a grid system (Twitter Bootstrap or Zurb Foundation) we can have rows and cols as the base components holding our placeholders. This way a content author can easily use Experience Editor to create a structure like this:

Row_ph_Top

Col_ph_TopLeft Col_ph_TopMiddle Col_ph_TopLeft
Row_ph_Content

Col_ph_ContentLeft Col_ph_ContentRight
Row_ph_Content2

Col_ph_ContentLeft2 Col_ph_ContentRight2

In a grid system with relative column size of 12 it would be equivalent to:

4 4 4
4 8
8 4

In order to have the dynamic placeholder keys generated as defined above we will combine the holding component name (Row or Col) with a dynamic placeholder pattern defined in a config file (_ph_) and finally with a suffix defined in the col or row component being dynamically added to our page.

The code I am using to achieve that is based on dynamic placeholder implementations available on the web and my implementation of it using Foundation. I have blogged about it before on this post: Implementing Zurb Foundation grid in Sitecore 8.1 with MVC

The code files below are an updated version from that previous post to achieve what we want now (be able to define the placeholder key when adding a component that contains a dynamic placeholder).

Our DynamicPlaceholder.config file will look like this:

<configuration xmlns:patch="http://www.sitecore.net/xmlconfig/">
 <sitecore>
 <pipelines>
<getPlaceholderRenderings>
 <processor
 type="Sitecore81Foundation.SitecoreExtensions.Pipelines.DynamicKeyPlaceholder.GetDynamicKeyAllowedRenderings, Sitecore81Foundation"
 patch:before="processor[@type='Sitecore.Pipelines.GetPlaceholderRenderings.GetAllowedRenderings, Sitecore.Kernel']"/>
 </getPlaceholderRenderings>
<getChromeData>
 <processor
 type="Sitecore81Foundation.SitecoreExtensions.Pipelines.GetChromeData.GetDynamicKeyPlaceholderChromeData, Sitecore81Foundation"
 patch:after="processor[@type='Sitecore.Pipelines.GetChromeData.GetPlaceholderChromeData, Sitecore.Kernel']"/>
 </getChromeData>
 </pipelines>
<!-- Pattern to use for dynamic placeholders -->
 <settings>
 <setting name="DynamicPlaceholderPattern" value="_ph_" />
 </settings>
</sitecore>
</configuration>

Here we have our updated Row.cshtml:

@using Sitecore.Mvc
@using Sitecore.Mvc.Presentation
@using Sitecore.Configuration

@model RenderingModel
@{
 string dph = Settings.GetSetting("DynamicPlaceholderPattern");
 string suffix = Sitecore.Mvc.Presentation.RenderingContext.Current.Rendering.Parameters["Placeholder Suffix"];
 string placeholderKey = "row";
if (!String.IsNullOrEmpty(suffix)) { placeholderKey = placeholderKey + dph + suffix; }
}

<div class="row">
 @if (Sitecore.Context.PageMode.IsPageEditorEditing)
 {
 <br /><label>[@Html.Raw(placeholderKey)]</label>
 }

@Html.Sitecore().Placeholder(placeholderKey)
 @if (Sitecore.Context.PageMode.IsPageEditorEditing)
 { <br /><br /> }
</div>

You will notice that we are just using a regular out-of-the-box Html.Sitecore().Placeholder() method. The key is dynamically defined on rendering time not using a GUID defined on an extension class, but rather just the component name, the dynamic placeholder pattern (that makes our life easier to identify which placeholders are dynamic) and the suffix entered by the content author in a rendering parameters field.

And our updated Col.cshtml:

@using Sitecore.Mvc
@using Sitecore.Mvc.Presentation
@using Sitecore.Configuration;
@model RenderingModel
@{
 string small = Sitecore.Mvc.Presentation.RenderingContext.Current.Rendering.Parameters["Small Devices"];
 string medium = Sitecore.Mvc.Presentation.RenderingContext.Current.Rendering.Parameters["Medium Devices"];
 string large = Sitecore.Mvc.Presentation.RenderingContext.Current.Rendering.Parameters["Large Devices"];

string dph = Settings.GetSetting("DynamicPlaceholderPattern");
 string suffix = Sitecore.Mvc.Presentation.RenderingContext.Current.Rendering.Parameters["Placeholder suffix"];
 string placeholderKey = "col";

if (!String.IsNullOrEmpty(suffix)) { placeholderKey = placeholderKey + dph + suffix; }
}

<div id="sfColumns" class="@Html.Raw(small) @Html.Raw(medium) @Html.Raw(large) columns">
 @if (Sitecore.Context.PageMode.IsPageEditorEditing) 
 {
 <br /><label>[@Html.Raw(placeholderKey)]</label> @* Required to make the column visible even when empty *@
 }

 @Html.Sitecore().Placeholder(placeholderKey)
 @if (Sitecore.Context.PageMode.IsPageEditorEditing)
 { <br /> }
</div>

Now we need to update our GetDynamicKeyAllowedRendering.cs file:

using Sitecore;
using Sitecore.Configuration;
using Sitecore.Data;
using Sitecore.Data.Items;
using Sitecore.Diagnostics;
using Sitecore.Pipelines.GetPlaceholderRenderings;
using System;
using System.Collections.Generic;
using System.Linq;
using System.Text.RegularExpressions;
using System.Web;

namespace Sitecore81Foundation.SitecoreExtensions.Pipelines.DynamicKeyPlaceholder
{
 public class GetDynamicKeyAllowedRenderings : GetAllowedRenderings
 {
  public new void Process(GetPlaceholderRenderingsArgs args)
  {
   string dphPattern = Settings.GetSetting("DynamicPlaceholderPattern");
   string placeholderKey = args.PlaceholderKey;

   if (placeholderKey.Contains(dphPattern))
   {
     placeholderKey = placeholderKey.Substring(0, placeholderKey.LastIndexOf(dphPattern));
     if (placeholderKey.LastIndexOf("/") >= 0)
     {
       placeholderKey = placeholderKey.Substring(placeholderKey.LastIndexOf("/") + 1);
     }
    }
    else
    {
      return;
    }

    Assert.IsNotNull((object)args, "args");
    Item placeholderItem = (Item)null;
    if (ID.IsNullOrEmpty(args.DeviceId))
    {
     placeholderItem = Client.Page.GetPlaceholderItem(placeholderKey, args.ContentDatabase, args.LayoutDefinition);
    }
    else
    {
     using (new DeviceSwitcher(args.DeviceId, args.ContentDatabase))
 placeholderItem = Client.Page.GetPlaceholderItem(placeholderKey, args.ContentDatabase, args.LayoutDefinition);
    }
    List<Item> list = (List<Item>)null;
    if (placeholderItem != null)
    {
     args.HasPlaceholderSettings = true;
     bool allowedControlsSpecified;
     list = this.GetRenderings(placeholderItem, out allowedControlsSpecified);
     if (allowedControlsSpecified)
     {
      args.CustomData["allowedControlsSpecified"] = true;
      args.Options.ShowTree = false;
     }
    }

    if (list != null)
    {
     if (args.PlaceholderRenderings == null)
     {
      args.PlaceholderRenderings = new List<Item>();
     }
     args.PlaceholderRenderings.AddRange(list);
    }
   }
  }
}

And finally we update the GetDynamicPlaceholderChromeData.cs file:

using System;
using System.Collections.Generic;
using System.Linq;
using System.Text;
using Sitecore.Pipelines.GetChromeData;
using System.Text.RegularExpressions;
using Sitecore.Diagnostics;
using Sitecore81Foundation.SitecoreExtensions.Pipelines.DynamicKeyPlaceholder;
using Sitecore.Data.Items;
using Sitecore.Web.UI.PageModes;
using Sitecore.Configuration;

namespace Sitecore81Foundation.SitecoreExtensions.Pipelines.GetChromeData
{
 public class GetDynamicKeyPlaceholderChromeData : GetPlaceholderChromeData
 {
  public override void Process(GetChromeDataArgs args)
  {
   string dphPattern = Settings.GetSetting("DynamicPlaceholderPattern");

   Assert.ArgumentNotNull(args, "args");
   Assert.IsNotNull(args.ChromeData, "Chrome Data");
   if ("placeholder".Equals(args.ChromeType, StringComparison.OrdinalIgnoreCase))
   {
     string placeholderKey = args.CustomData["placeHolderKey"] as string;

     // Is a Dynamic Placeholder
     if (placeholderKey.Contains(dphPattern))
     {
       placeholderKey = placeholderKey.Substring(0, placeholderKey.LastIndexOf(dphPattern));
       if (placeholderKey.LastIndexOf("/") >= 0)
       {
         placeholderKey = placeholderKey.Substring(placeholderKey.LastIndexOf("/") + 1);
       }
    }

    args.ChromeData.DisplayName = placeholderKey;
    args.ChromeData.ExpandedDisplayName = placeholderKey + " Dynamic Placeholder";
   }
  } 
 }
}

Row and Col will have the Placeholder suffix field added to their rendering parameters template.

At /sitecore/templates/SFoundation/Rendering Parameters/Row I have:

renderingparameters

Note: in our original implementation of the Grid with Foundation, Col also has three other fields to define its relative size on small, medium and large devices. These fields should be preserved. Row didn’t have placeholder parameters, so it will now have one using only the Placeholder suffix field.

Update: please, in the screenshots read it Suffix, not Sufix (my typo!)

And we are now able to add Rows and Cols in Experience Editor and define the suffix to be used for each one of them:

topleft

This approach preserves your definition for Allowed Controls made to the placeholder keys row and col. The GetDynamicKeyAllowedRenderings class will remove the pattern and suffix and use only the portion before the dynamic key pattern as the key to look for any allowed renderings.

Final result:

final

What happens if they leave the suffix field empty? It will just use the default key: row or col, working as it would normally work as a non-dynamic placeholder. Therefore, leaving more than two blank will just have the old issue of two placeholders with the same key. The same will also happen if the author uses the same suffix for two different rows or two different columns. Therefore, there is still room for improvement to validate this scenarios or to automatically generate a random key and update the parameter field when it is left blank.

Another improvement for the future is when an author renames the suffix. Currently, if the suffix for a placeholder is renamed the components it may currently be holding will not be automatically updated to the new name. This is my next step and I will share it with your here once I have it implemented.

And that’s it. Hope you have enjoyed.


Zurb Foundation Orbit Slider implemented with Sitecore 8.1

Tags

Orbit is a very nice and clean responsive slider available with Zurb Foundation version 5. Although it is being deprecated by the Zurb team, it will still continue to be supported. That’s because it really works well and many websites and front-end developers still use it. Anyway, the concepts presented on this post are applicable to the implementation of basically any other sliders available out there. I will soon be also posting here the use of this same approach to implement Slick Carousel, which is one of the recommended alternative sliders suggested by the Zurb team.

The documentation for the Orbit slider is available here: http://foundation.zurb.com/docs/components/orbit.html 

To have it implemented with Sitecore we need to consider a few things:

  1. We want to have it Experience Editor friendly
  2. Its content (slides) may live under the page we are editing or come from a shared repository of sliders reused through the site
  3. We rely our implementation on top of our previous implementation of the Zurb Foundation’s grid system

The first part of implementing a component in Sitecore is defining its data model. In other words, how its templates are organized. For this slider we will have three templates defined: one for the slider collection, one for the definition of each slide, and a third one for the component presentation parameters (aka rendering parameters). We will also have one branch template to automatically create the structure for sliders and slides, with a sample default slide, and one folder template to hold the slider components (and any other components) on a page.

Templates

  1. Slider

The slider template doesn’t have any fields, however it exists so it can have in its standard values the insert option configuration done to allow only the creation of slide items under it.

Capture

2.slide

The slide template has two fields: image and caption. The image field will have a default placeholder slide image defined in the standard values of the template.

Untitled

Standard values of the Slide template pointing to a default placeholder image:

Default placeholder image

3. Orbit slider rendering parameters

The Orbit slider has many possible parameters listed on its documentation (link above). We will in our example implement only three of them: timer, timer_speed and navigation_arrows.

Slider Parameters

As these parameter names are not exactly user friendly, we will also define a value for the Title field of each one of them. We want to have the following titles being displayed:

  • timer: User autoplay timer
  • timer_speed: Autoplay Speed
  • navigation_arrows: Show Arrows

The image below shows where to do it for the timer field. The same thing needs to be done for timer_speed and navigation_arrows fields.

Title field

In the standard values of our Rendering Parameters template we want to put a default value of 3000 for the timer_speed parameter (Autoplay Speed) and define the timer default status to checked (Use autoplay timer).

standard values for rendering parameters

4. slider branch template

Our branch template will have the basic structure for a slider with one sample slide as its child item.

Branch template

5. Page Components Template

This is a template with no fields. It will be used to define the datasource location for the view rendering (explained further down in this post).

Page Components template

Layout: Rendering and Placeholder Settings

We will use a Sitecore MVC view rendering. Our view rendering item will point to the cshtml view that will be used to present the slider. We also define its rendering parameters template.

layout

Now we add our rendering component to the Allowed Controls list of the Col placeholder, which is our placeholder for columns in our Zurb grid implementation.

Placeholder

Content Tree Organization

In the content tree we want to organize the folders where sliders can be created. In our example we will have a Shared Sliders folder for sliders that are created once and shared with many pages in our site. Each page will also have a Page Components folder for sliders (and other components) that are created only for the scope of that page.

Sample content tree showing Page 1 having a local Page Slider and the Shared Components folder with sample common sliders:

Content Tree

To make these two locations available when setting the datasource for an item in Experience Explorer, we need now to go back to our view rendering item and define the Datasource Location and Datasource Template fields.

datasource location and template

Datasource Location: 
query:./ancestor-or-self::*/child::*[@@templatename='Site']/Shared Components/Shared Sliders|query:./child::*[@@templatename='Page Components']

Datasource Template (it is our branch template):
/sitecore/templates/Branches/SFoundation/Slider

We also want content authors to be able to add slides to the slider collection. To allow for that we add the Insert button to the Experience Editor Buttons field of our view rendering.

Add icon

View Implementation

The implementation of our view rendering is actually pretty simple and it is based on the example provided by the documentation page from Zurb Foundation for the Orbit slider.

Parameters are passed as an HTML data-options parameter:

<ul data-orbit data-options="animation:slide; pause_on_hover:true; animation_speed:500; navigation_arrows:true; bullets:false;"> 
</ul>

Slides are defined as <li> elements of the <ul> collection:

<li> 
   <img src="../img/examples/satelite-orbit.jpg" alt="slide 1" /> 
   <div class="orbit-caption"> Caption One. </div> 
</li>

Here it is our implementation considering the only 3 parameters we have added to our rendering parameters template so far:

@using Sitecore.Mvc
@using Sitecore.Data.Items;
@using Sitecore.Mvc.Presentation

@model RenderingModel
@{
 var param = Sitecore.Mvc.Presentation.RenderingContext.Current.Rendering.Parameters;
 string timer = ((param["timer"] ?? "1") == "1" ? "true" : "false");
 string timer_speed = param["timer_speed"] ?? "3000";
 string navigation_arrows = ((param["navigation_arrows"] ?? "0") == "1" ? "true" : "false");
}

<div>
 @if (Sitecore.Context.PageMode.IsPageEditorEditing)
 {
    <br /><label>[Orbit Slider]</label>
 }

 <ul class="example-orbit" @(Sitecore.Context.PageMode.IsPageEditorEditing ? "" : "data-orbit") 
 data-options="timer: @Html.Raw(timer); timer_speed: @Html.Raw(timer_speed); navigation_arrows: @Html.Raw(navigation_arrows);"> 
 @foreach (Item slide in Model.Item.Children) 
 { <li>
     @Html.Sitecore().Field("Image", slide)
     < div class="orbit-caption">
     @Html.Sitecore().Field("Caption", slide)
     < /div>
   </li>
 }
 </ul>

 @if (Sitecore.Context.PageMode.IsPageEditorEditing)
 { < br /> }
< /div>

Experience Editor

The result on Experience Editor is that once we have a column added to a row in our grid we are now able to add an Orbit Slider to the column.

Adding Component

Once the slider is added, because we have defined the two queries on the datasource location field of the rendering view, we are presented with the two possible locations from where to pick existing content or to create new content for the slider.

Datasource location selection

After selecting an existing slider we are presented with its collection of slides. In case of selecting Create New Content a default placeholder slide image (from standard values) is presented on the default slide.

Capture

You can now click on the image or in the caption field and edit its content. If you want to add a new slide, you just need to save your page and click on the Insert a New Item icon.

Insert a new item

add slide

While on Edit mode and having more than one slide in your slider, the slides are presented in a sequence to facilitate content editing. When switching back to Preview mode they are presented as they would look like in the final result.

Edit Mode

Edit mode

Preview Mode

Preview Mode

When you select to edit the properties for the component it brings you the Control Properties window allowing the content author to edit the parameters we have implemented for the slider.

Component properties

And that’s it for the Orbit slider. Hope the explanation for this approach I have used was helpful for you.

Next time we will just tweak it a little bit to use the same approach with the Slick Carousel instead.

How to make the Edit component properties button always visible in one click in Sitecore Experience Editor

Tags

,

The “Edit component properties” button is a little bit hidden on Sitecore Experience Editor. You actually need two clicks to find it. One on the component you want to edit and a second click on the More dropdown to find this option.

First click:

Capture

Second click:

secondclick

If you want to avoid content authors needing to make that second click you should do the following:

  1. Switch to Core database
  2. Browse to the item: /sitecore/content/Applications/WebEdit/Default Rendering Buttons/Properties
  3. Change the Type field from Common to Sticky
  4. Save the item

Now you can go back to your master db, open Experience Editor and click the component again. You should now see the following:

oneclick

And that should save some clicks on a content author’s day.

Automated migration of content items from Sitecore 6.5 to Sitecore 8.1

Tags

A question on Sitecore Community on how to automate migration of content from Sitecore 6.5 to Sitecore 8 led me to write this post. The idea I proposed was to set the Sitecore 6.5 master database as an additional database in the Sitecore 8 instance and this way be able to read the content from Sitecore 6.5 and switch to the Sitecore 8 db to write that content on it. I was not sure whether such idea would actually work or not, that’s why I decided to put it to a test and write a small PoC on it.

One of the suggestions on how to do it was to simply create a package with Sitecore Package Designer from Sitecore 6.5 and install it on Sitecore 8. However, as it is common on such scenarios, the new solution on Sitecore 8 didn’t have the same architecture, therefore simply packing and installing would not resolve the problem. Templates and fields had actually changed.

In my PoC I am working with a simple but common scenario of architectural change in Sitecore. In this scenario we have one Sitecore 6.5 template with a pre-defined and limited set of fields for only 3 slides, while the new solution on Sitecore 8 we have two templates, with one of the templates being specific for slides, allowing for not just three but multiple slides to be added.

In this PoC I am using Sitecore version 6.5 for the source and and Sitecore 8.1 as my target.

Source: Sitecore 6.5

Template name: Page65

 Field  Type
 Title Single-Line Text
 Content  Rich Text
 Slide1  Image
 Slide2  Image
 Slide3  Image
Target: Sitecore 8.1

Template name: Page81

 Field  Type
 Title Single-Line Text
 Content  Rich Text

Template name: Slide81

Field  Type
Image  Image

Our approach will be the following:

  1. In Sitecore 8.1:
    1. add a connection string to our ConnectionStrings.config file to connect to Sitecore 6.5 master db
    2. add a site using the new connection string to our Sitecore.config file (web.config in previous versions).
  2. Migrate media items first (to ensure we have the right link mappings for the Image fields)
  3. Migrate the Page65 items to Page81 items created on the fly (in a loop going through all Page65 items from Sitecore 6.5) moving Title to Title and Content to Content.
  4. Create a new Slide81 items for each Slide field being used in the Page65 item, moving Slide1, Slide2 or Slide3 to the Image field of the Slide81 item

For the sake of simplicity I created two Page65 items and three images in the Sitecore 65’s Media Library. This is our source content:

Capture

The ConnectionString file in Sitecore 8.1 will look like this:

<?xml version="1.0" encoding="utf-8"?>
<connectionStrings>
 <!-- 
 Sitecore connection strings.
 All database connections for Sitecore are configured here.
 -->
 <add name="core" connectionString="user id=sa;password=pw;Data Source=LAPTOP\SQLEXP;Database=Sitecore811_Core" />
 <add name="master" connectionString="user id=sa;password=pw;Data Source=LAPTOP\SQLEXP;Database=Sitecore811_Master" />
 <add name="master65" connectionString="user id=sa;password=pw;Data Source=LAPTOP\SQLEXPRESS;Database=sc65Sitecore_Master"/>
 <add name="web" connectionString="user id=sa;password=pw;Data Source=LAPTOP\SQLEXP;Database=Sitecore811_Web" />
 <add name="analytics" connectionString="mongodb://localhost/sc811_analytics" />
 <add name="tracking.live" connectionString="mongodb://localhost/sc811_tracking_live" />
 <add name="tracking.history" connectionString="mongodb://localhost/sc811_tracking_history" />
 <add name="tracking.contact" connectionString="mongodb://localhost/sc811_tracking_contact" />
 <add name="reporting" connectionString="user id=sa;password=pw*;Data Source=LAPTOP\SQLEXP;Database=Sitecore811_Analytics" />
</connectionStrings>

The Sitecore.config file additional site (under <databases>):

 <!-- master 65 -->
 <database id="master65" singleInstance="true" type="Sitecore.Data.Database, Sitecore.Kernel">
 <param desc="name">$(id)</param>
 <icon>Images/database_master.png</icon>
 <dataProviders hint="list:AddDataProvider">
 <dataProvider ref="dataProviders/main" param1="$(id)">
 <prefetch hint="raw:AddPrefetch">
 <sc.include file="/App_Config/Prefetch/Common.config" />
 <sc.include file="/App_Config/Prefetch/Master65.config" />
 </prefetch>
 </dataProvider>
 </dataProviders>
 <securityEnabled>true</securityEnabled>
 <proxiesEnabled>false</proxiesEnabled>
 <publishVirtualItems>true</publishVirtualItems>
 <proxyDataProvider ref="proxyDataProviders/main" param1="$(id)" />
 <workflowProvider hint="defer" type="Sitecore.Workflows.Simple.WorkflowProvider, Sitecore.Kernel">
 <param desc="database">$(id)</param>
 <param desc="history store" ref="workflowHistoryStores/main" param1="$(id)" />
 </workflowProvider>
 <archives hint="raw:AddArchive">
 <archive name="archive" />
 <archive name="recyclebin" />
 </archives>
 <Engines.HistoryEngine.Storage>
 <obj type="Sitecore.Data.$(database).$(database)HistoryStorage, Sitecore.Kernel">
 <param connectionStringName="$(id)" />
 <EntryLifeTime>30.00:00:00</EntryLifeTime>
 </obj>
 </Engines.HistoryEngine.Storage>
 <Engines.HistoryEngine.SaveDotNetCallStack>false</Engines.HistoryEngine.SaveDotNetCallStack>
 <NotificationProvider type="Sitecore.Data.DataProviders.$(database).$(database)NotificationProvider, Sitecore.Kernel">
 <param connectionStringName="$(id)">
 </param>
 <param desc="databaseName">$(id)</param>
 </NotificationProvider>
 <cacheSizes hint="setting">
 <data>100MB</data>
 <items>50MB</items>
 <paths>2500KB</paths>
 <itempaths>50MB</itempaths>
 <standardValues>2500KB</standardValues>
 </cacheSizes>
 </database>

Prefetch/Master65.config is just a copy of Prefetch/Master.config. It could possibly just point to the same config file.

Not let’s go to our code. (image screenshots first; text version can be found below in case you want to copy and paste)

First we get references to the databases, starting items (media library and content) and target templates to be used.

Capture

Now we loop through the Media Library items that are children items of Media Library/Images node in Sitecore 6.5 and we migrate them first:

Capture

Finally we migrate the content items that are children items of our Site65 node in Sitecore 6.5 (a real site with multiple nodes would require, of course, a recursive loop to go deeper down in the three and migrate everything, it would also require the appropriate conditions to check the template of each item being read, in our simple example all items are Page65 and they are all children items of Site65):

Capture

And we create one Slide item for each one of the three slide fields from Sitecore 6.5 having content:

Capture

And after using this code in a sub-layout or MVC rendering and executing it, this is the result in Sitecore 8.1:

Untitled

A screenshot of the Slide1 item under Page65-1:Untitled

Some important observations:

  • All content from the Rich-text field is being migrate as is. In a real site migration scenario, where a new visual design is in place, there is probably a lot of cleaning required to be made on any possible HTML and inline styles on the content of the rich-text field. Additional logic for such cleaning should be applied to these fields following the requirements for the new design.
  • The purpose of this post was just to test the concept of having Sitecore’s 6.5 and 8.1 databases being used together in a Sitecore 8.1 environment for content migration purposes. Internal links were not addressed in this post, I plan to do it in a future post. Basically the problem is that you can’t simply direct migrate the content of link fields because in Sitecore 8.1 the target items will have different GUIDs. The recommended approach is that you have the target content tree (skeleton site) created first in Sitecore 8.1 prior to executing the full migration. This way you can get a reference for each target path and get its new GUID when migrating such fields.
  • This approach is also based on the assumption that the source and target content trees will follow the same pattern. On scenarios where the Information Architecture is different it will also be required to have a mapping matrix in place (e.g. /about-us/careers from Sitecore 6.5 maps to /our-company/opportunities/careers in the new Sitecore 8.1 sitemap).
  • In this simple PoC I just worked with images. Additional logic is required for different media types (videos, pdfs, etc.)

If you have any other observations to be considered by people reading this post, feel free to send them in a comment and I will get them published.

Here it is the complete code I used:

 public bool PerformMigration()
 {
 // get reference to the two master databases (Sitecore 6.5 and sitecore 8.1)
 Sitecore.Data.Database dbMaster65 = Sitecore.Data.Database.GetDatabase("master65");
 Sitecore.Data.Database dbMaster81 = Sitecore.Data.Database.GetDatabase("master");

 // get references to the media folders
 Item source_media_item = dbMaster65.GetItem("/sitecore/media library/Images");
 Item target_media_item = dbMaster81.GetItem("/sitecore/media library/Images");
 string target_media_item_path = "/sitecore/media library/Images";

 // get references to the root items
 Item source_root_item = dbMaster65.GetItem("/sitecore/content/Home/Site65");
 Item target_root_item = dbMaster81.GetItem("/sitecore/content/Home/Site81");

 // get references to the templates to be used on Sitecore 8.1 based on their GUID
 TemplateItem page81 = dbMaster81.GetTemplate("103D265E-AF04-44A9-8046-53A765E8C150"); 
 TemplateItem slide81 = dbMaster81.GetTemplate("CE9C91BE-42B9-4F52-A3ED-97203B2B4E28"); 

 // first we migrate the media items
 foreach (Sitecore.Data.Items.Item source_media in source_media_item.Children)
 {
 using (new SecurityDisabler())
 {
 // Media options to create the media item in Sitecore 8.1
 Sitecore.Resources.Media.MediaCreatorOptions options = 
 new Sitecore.Resources.Media.MediaCreatorOptions();
 options.FileBased = false;
 options.IncludeExtensionInItemName = false;
 options.Versioned = true;
 options.Destination = target_media_item_path + "/" + source_media.Name;
 options.Database = dbMaster81;

 // Read the media item stream from Sitecore 6.5
 Stream memoryStream = new MemoryStream();
 MediaItem source = dbMaster65.GetItem(source_media.ID);
 memoryStream = source.GetMediaStream();

 // Recreate the item in Sitecore 8.1 using the stream
 Item new_media_item = 
 Sitecore.Resources.Media.MediaManager.
 Creator.CreateFromStream(memoryStream, source_media.Name, options);

 // Update the media item fields in sitecore 8.1 with the content from Sitecore 6.5
 new_media_item.Editing.BeginEdit();
 new_media_item.Fields["Title"].Value = source_media.Fields["Title"].Value;
 new_media_item.Fields["Keywords"].Value = source_media.Fields["Keywords"].Value;
 new_media_item.Fields["Description"].Value = source_media.Fields["Description"].Value;
 new_media_item.Fields["Extension"].Value = source_media.Fields["Extension"].Value;
 new_media_item.Fields["Mime Type"].Value = source_media.Fields["Mime Type"].Value;
 new_media_item.Fields["Size"].Value = source_media.Fields["Size"].Value;
 new_media_item.Fields["Format"].Value = source_media.Fields["Format"].Value;
 new_media_item.Editing.EndEdit();
 new_media_item.Editing.AcceptChanges();
 }
 }

 // next we migrate the content items
 foreach (Sitecore.Data.Items.Item source_item in source_root_item.Children)
 {
 using (new SecurityDisabler())
 {
 Item new_page_item = target_root_item.Add(source_item.Name, page81);

 new_page_item.Editing.BeginEdit();
 new_page_item.Fields["Title"].Value = source_item.Fields["Title"].Value;
 new_page_item.Fields["Content"].Value = source_item.Fields["Content"].Value;
 new_page_item.Editing.EndEdit();
 new_page_item.Editing.AcceptChanges();

 if (source_item.Fields["Slide1"].Value != "")
 {
 Item new_slide1 = new_page_item.Add("Slide1", slide81);

 new_slide1.Editing.BeginEdit();
 ImageField source_image = source_item.Fields["Slide1"];
 MediaItem target_image = 
 dbMaster81.GetItem(target_media_item_path + "/" + source_image.MediaItem.Name);
 ((ImageField)new_slide1.Fields["Image"]).MediaID = target_image.ID;
 new_slide1.Editing.EndEdit();
 new_slide1.Editing.AcceptChanges();
 }

 if (source_item.Fields["Slide2"].Value != "")
 {
 Item new_slide1 = new_page_item.Add("Slide2", slide81);

 new_slide1.Editing.BeginEdit();
 ImageField source_image = source_item.Fields["Slide2"];
 MediaItem target_image = 
 dbMaster81.GetItem(target_media_item_path + "/" + source_image.MediaItem.Name);
 ((ImageField)new_slide1.Fields["Image"]).MediaID = target_image.ID;
 new_slide1.Editing.EndEdit();
 new_slide1.Editing.AcceptChanges();
 }

 if (source_item.Fields["Slide3"].Value != "")
 {
 Item new_slide1 = new_page_item.Add("Slide3", slide81);

 new_slide1.Editing.BeginEdit();
 ImageField source_image = source_item.Fields["Slide3"];
 MediaItem target_image = 
 dbMaster81.GetItem(target_media_item_path + "/" + source_image.MediaItem.Name);
 ((ImageField)new_slide1.Fields["Image"]).MediaID = target_image.ID;
 new_slide1.Editing.EndEdit();
 new_slide1.Editing.AcceptChanges();
 }
 }
 }
 return true;
 }

Hope this post may be helpful to you! Thanks.

Implementing Zurb Foundation grid in Sitecore 8.1 with MVC

Tags

, ,

Hello there, as everyone already knows, webforms development in .NET is going to die one day. Therefore, we shall embrace MVC. So during the past weeks I have been putting my hands (and head) on the MVC world and I would like to share with you a Sitecore 8.1 implementation of the Zurb Foundation grid based front-end framework. I am using version 5.5.3, you can download it from this link.

The first thing to understand is that this is a grid made of rows and columns. Each row can have up to 12 columns. Each column can have different sizes defined for small, medium and large devices (smartphones, tablets and laptops/desktops). A basic HTML markup for rows and columns would look like this:

Capture

So, to get this framework implemented we need a few things:

  1. Dynamic placeholders
  2. Define templates
  3. Define and code our main layout
  4. Define and code renderings
  5. Define and configure placeholders

1. Dynamic placeholders

Sitecore 8.1 still doesn’t have native support for dynamic placeholders, therefore I am basing my implementation on the approach recommended on this answer from Stack Overflow. It is not exactly the same code since I have changed the way it defines whether the placeholder is dynamic or not by placing a “_dph_” string on its key and made a few modifications to make it work fine with my Sitecore 8.1 instance.

Dynamic placeholders are required so we can dynamically add as many rows and cols we want in a page, each one with its own placeholder with a shared key configured to accept specific renderings and also its own dynamically generated individual key to make sure the renderings are placed on the right placeholder.

For that we need 3 classes here:

  • GetDynamicKeyAllowedRendering.cs
  • GetDynamicKeyPlaceholderChromeData.cs
  • RazorExtension.cs
GetDynamicKeyAllowedRendering.cs
using Sitecore;
using Sitecore.Data;
using Sitecore.Data.Items;
using Sitecore.Diagnostics;
using Sitecore.Pipelines.GetPlaceholderRenderings;
using System;
using System.Collections.Generic;
using System.Linq;
using System.Text.RegularExpressions;
using System.Web;

namespace Sitecore81Foundation.SitecoreExtensions.Pipelines.DynamicKeyPlaceholder
{
 public class GetDynamicKeyAllowedRenderings : GetAllowedRenderings
 {
 public new void Process(GetPlaceholderRenderingsArgs args)
 {
 string placeholderKey = args.PlaceholderKey;

 if (placeholderKey.Contains("_dph_"))
 {
 placeholderKey = placeholderKey.Substring(0, placeholderKey.LastIndexOf("_dph_"));
 if (placeholderKey.LastIndexOf("/") >= 0)
 {
 placeholderKey = placeholderKey.Substring(placeholderKey.LastIndexOf("/") + 1);
 }
 }
 else
 {
 return;
 }

 Assert.IsNotNull((object)args, "args");
 Item placeholderItem = (Item)null;
 if (ID.IsNullOrEmpty(args.DeviceId))
 {
 placeholderItem = Client.Page.GetPlaceholderItem(placeholderKey, args.ContentDatabase, args.LayoutDefinition);
 }
 else
 {
 using (new DeviceSwitcher(args.DeviceId, args.ContentDatabase))
 placeholderItem = Client.Page.GetPlaceholderItem(placeholderKey, args.ContentDatabase, args.LayoutDefinition);
 }
 List<Item> list = (List<Item>)null;
 if (placeholderItem != null)
 {
 args.HasPlaceholderSettings = true;
 bool allowedControlsSpecified;
 list = this.GetRenderings(placeholderItem, out allowedControlsSpecified); 
 if (allowedControlsSpecified)
 {
 args.CustomData["allowedControlsSpecified"] = true;
 args.Options.ShowTree = false;
 }
 }

 if (list != null)
 {
 if (args.PlaceholderRenderings == null)
 {
 args.PlaceholderRenderings = new List<Item>();
 }
 args.PlaceholderRenderings.AddRange(list);
 }
 }
 }
}
GetDynamicKeyPlaceholderChromeData.cs
using System;
using System.Collections.Generic;
using System.Linq;
using System.Text;
using Sitecore.Pipelines.GetChromeData;
using System.Text.RegularExpressions;
using Sitecore.Diagnostics;
using Sitecore81Foundation.SitecoreExtensions.Pipelines.DynamicKeyPlaceholder;
using Sitecore.Data.Items;
using Sitecore.Web.UI.PageModes;

namespace Sitecore81Foundation.SitecoreExtensions.Pipelines.GetChromeData
{
 public class GetDynamicKeyPlaceholderChromeData : GetPlaceholderChromeData
 {
 public override void Process(GetChromeDataArgs args)
 {
 Assert.ArgumentNotNull(args, "args");
 Assert.IsNotNull(args.ChromeData, "Chrome Data");
 if ("placeholder".Equals(args.ChromeType, StringComparison.OrdinalIgnoreCase))
 {
 string placeholderKey = args.CustomData["placeHolderKey"] as string;

 // Is a Dynamic Placeholder
 if (placeholderKey.Contains("_dph_"))
 {
 placeholderKey = placeholderKey.Substring(0, placeholderKey.LastIndexOf("_dph_"));
 if (placeholderKey.LastIndexOf("/") >= 0)
 {
 placeholderKey = placeholderKey.Substring(placeholderKey.LastIndexOf("/") + 1);
 }
 }

 args.ChromeData.DisplayName = placeholderKey;
 args.ChromeData.ExpandedDisplayName = placeholderKey + " Dynamic Placeholder";
 }
 }
 }
}
RazorExtension.cs
using Sitecore.Mvc.Presentation;
using System;
using System.Collections.Generic;
using System.Linq;
using System.Web;

namespace Sitecore81Foundation.SitecoreExtensions.DynamicKeyPlaceholder
{
 public static class RazorExtension
 {
 public static HtmlString DynamicPlaceholder(this Sitecore.Mvc.Helpers.SitecoreHelper helper, string dynamicKey)
 {
 var currentRenderingId = RenderingContext.Current.Rendering.UniqueId;
 return helper.Placeholder(string.Format("{0}_dph_{1}", dynamicKey, currentRenderingId));
 }
 }
}

2. Define templates

Assuming we want to organize our implementation for multi-sites we will need a few templates:

Template Description
Site to organize and configure our sites in the content tree
Home for the home page item
Col Rendering parameters template for the Column rendering (to define its size)

For now Site and Home will have no fields. The fields for Col are displayed below:

Field Name Type Source
Small Devices Droplist /sitecore/content/SFoundation Configuration/Lists/Columns Small Devices
Medium Devices Droplist /sitecore/content/SFoundation Configuration/Lists/Columns Medium Devices
Large Devices Droplist /sitecore/content/SFoundation Configuration/Lists/Columns Large Devices

It is important to remember that as rendering parameters template, Col needs to have Standard Rendering Parameters as its base template. This base template is located at /sitecore/templates/System/Layout/Rendering Parameters.

3. Define and code our main layout

Our main layout will make use of Foundation css and js files. We could (and probably should) later add them to a bundle and use @Scripts.Render and @Styles.Render, but for now we will just reference them the classic way.

So this is our main layout:

MainFoundationLayout.cshtml
@using Sitecore.Mvc
@using Sitecore.Mvc.Analytics.Extensions
@using Sitecore.Mvc.Presentation
@model RenderingModel
@{
 Layout = null;
}
<!DOCTYPE html>
<html>
<head>
 <title>@Html.Sitecore().Field("title", new { DisableWebEdit = true })</title>
 <meta charset="utf-8" />
 <meta name="viewport" content="width=device-width, initial-scale=1.0" />
 <link rel="stylesheet" href="/css/foundation.css" />
 /js/vendor/modernizr.js
 @Html.Sitecore().VisitorIdentification()
</head>
<body>
 < div>
 @Html.Sitecore().Placeholder("main")
 </div>
 < script src="/js/vendor/jquery.js"></script>
 @if (Sitecore.Context.PageMode.IsPageEditorEditing) {
 < script>jQuery.noConflict();</script>
 }

 < script src="/js/foundation.min.js"></script>
 < script>
 $(document).foundation();
 </script>
</body>
</html>

You have noticed that after inserting jquery.js we are verifying whether we are in Page Editor (Experience Editor) mode. To avoid any conflict with Experience Editor’s jQuery we add a jQuery.noConflict() call.

We have one static placeholder called main. And this placeholder should be configured to accept Row renderings once we have it created and configured in Sitecore.

Now we add the reference to our main layout in Sitecore:

Capture

4. Define and code renderings

We will write the Row and Col renderings to accept dynamic placeholders. The Col rendering will also read from the rendering parameters to define the size for the row.

When we are in Page Editor mode we also want to add an extra line to identify our row and make it visible to be edited even if it is empty (with not other components added on it). An extra blank line (<br />) is also added at the end of the component to provide space for the Add Here buttons when in Edit mode.

Row.cshtml
@using Sitecore.Mvc
@using Sitecore.Mvc.Presentation
@using Sitecore81Foundation.SitecoreExtensions.DynamicKeyPlaceholder

@model RenderingModel
@{
 string s = Sitecore.Mvc.Presentation.RenderingContext.Current.Rendering.Parameters.ToString();
}

< div class="row">
 @if (Sitecore.Context.PageMode.IsPageEditorEditing)
 {
 <br /><label>[row]</label>
 }

 @Html.Sitecore().DynamicPlaceholder("row")
 @if (Sitecore.Context.PageMode.IsPageEditorEditing)
 { <br /> }
</div>
Col.cshtml
@using Sitecore.Mvc
@using Sitecore.Mvc.Presentation
@using Sitecore81Foundation.SitecoreExtensions.DynamicKeyPlaceholder

@model RenderingModel
@{
 string small = Sitecore.Mvc.Presentation.RenderingContext.Current.Rendering.Parameters["Small Devices"];
 string medium = Sitecore.Mvc.Presentation.RenderingContext.Current.Rendering.Parameters["Medium Devices"];
 string large = Sitecore.Mvc.Presentation.RenderingContext.Current.Rendering.Parameters["Large Devices"];
}
< div id="sfColumns" class="@Html.Raw(small) @Html.Raw(medium) @Html.Raw(large) columns">
 @if (Sitecore.Context.PageMode.IsPageEditorEditing) 
 {
 <br /><label>[col]</label> @* Required to make the column visible even when empty *@
 }
 
 @Html.Sitecore().DynamicPlaceholder("col")
 @if (Sitecore.Context.PageMode.IsPageEditorEditing)
 { <br /> }
</div>
In Sitecore I am configuring the rendering items under /sitecore/layout/Renderings/SFoundation/Structure (SFoundation and Structure are two new folders I added).

The Row rendering item will have the following field set:

  • Path: /Views/SFoundation/Structure/Row.cshtml (this is the file path to the Row MVC rendering I’ve coded)

The Col rendering item will have the following fields set:

  • Path: /Views/SFoundation/Structure/Col.cshtml
  • Parameters Template: Templates/SFoundation/Rendering Parameters/Col (this is my path in Sitecore to the Col rendering parameters template I’ve created)
  • Open Properties after Add: Yes

5. Define and configure placeholders

Now I want to configure the Placeholder Settings for my main layout Main placeholder, Row and Col. I create a folder for SFoundation and inside the folder I add three placeholders: main, row and col.

Main placeholder key is main and in the Allowed Controls we add the Row rendering.

Row pladeholder key is row and in the Allowed Controls we add the Col rendering.

Col placeholder key is col and in the Allowed Controls we add the Row rendering (allowing for recursively creating rows inside cols and so on).

Final Result

Here we have a screen shot of our content tree:

Untitled

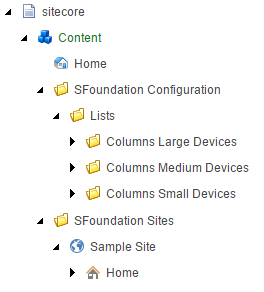
This is how Columns Large Devices look like (Medium and Small will follow the same pattern):

Capture

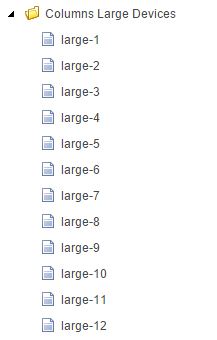
large-1 to large-12 items have no fields, they are created only to populate the rendering parameters dropdown list.

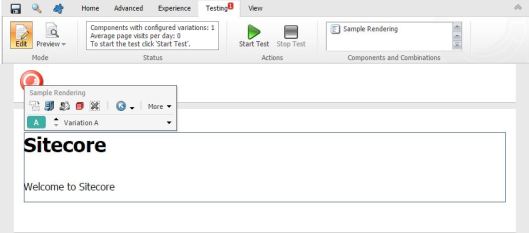
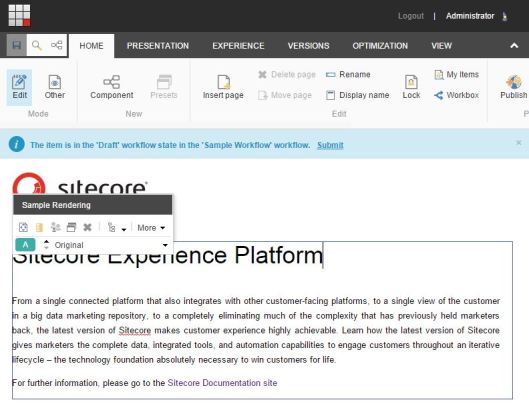
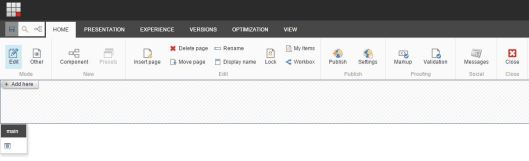
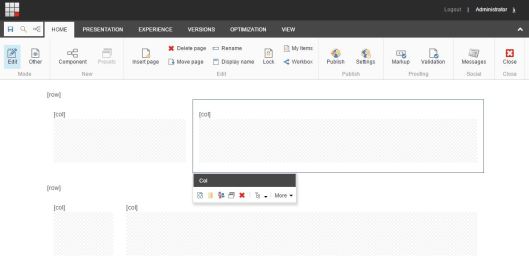
And this is the result on Experience Editor:

First you get just an empty placeholder:

Capture

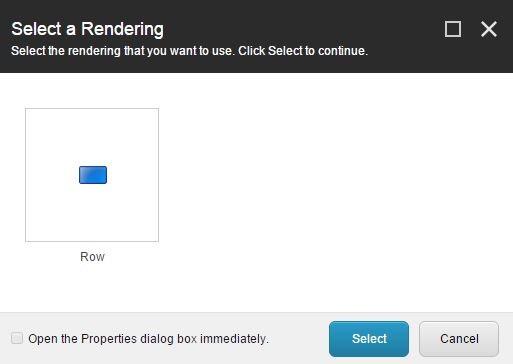
Once you click Add here you can then add your first Row to the grid.

Capture

Once your first row is added you can now add columns to it.

Capture

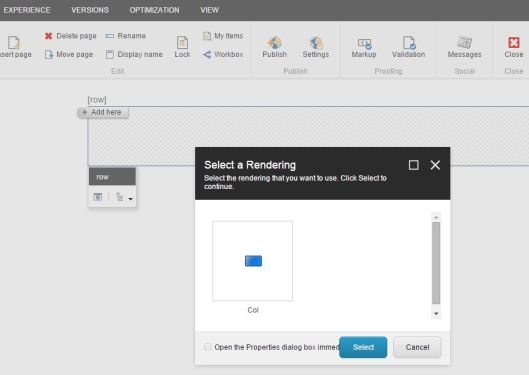
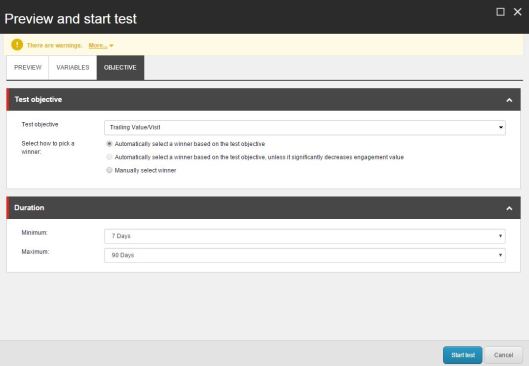
As soon the Col rendering is added it will prompt the user to select the size for the column.

Untitled

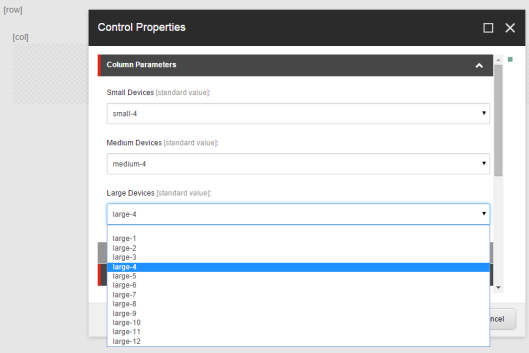
Thanks to the extra spacing added for when on Page Editor mode you can easily see where each Add here button will add a new rendering.

Capture

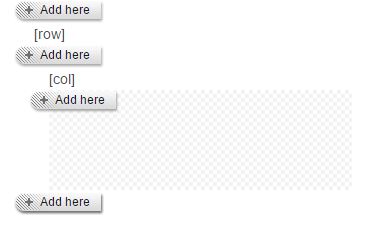
Final result with two rows having two columns each.

Capture

On the next post I will share my implementation of the first two Zurb Foundation components: Orbit Slider and Top Bar.

Sitecore Component Add here button design issue

A pet peeve of mine is when Sitecore’s component Add here button renders like this:

Capture

It is just a small detail, but it seems visually broken. And I don’t like it. So, if you are like me and you also don’t like it and for whatever reason you are seeing the Add here button rendered this way, this is what you can do about it.

  1. Open the webedit.css file
  2. Find the .scInsertionHandleCenter class (in Sitecore 8.1 it is on line 596, other previous versions it would be around line 500)
  3. Comment out or delete the line with “height: 11px”

The class will now look like this:

.scInsertionHandleCenter
{
 background: transparent url('/sitecore/shell/themes/standard/images/pageeditor/move_to_here_center.png') repeat-x;
 float: left;
/*height: 11px;*/ /* We don't need this, until proven otherwise */
 padding-top: 3px;
 padding-bottom: 9px;
}

And the button will now render like this:

Capture

Doesn’t it simply look better? 🙂

Anchor links and Target window on internal Sitecore links with Sitecore 8

There are two known issues with the latest release of the Sitecore Insert Link speak interface in Sitecore 8 update 5. The missing anchor field for internal links and the Target dropdown not being populated.

The interface looks like this:

Capture

As shown above the fields available are Description, Target, Alternate Text, Style class, and Query string. The Anchor button on the top left allows you at add an anchor link on the same page you are editing, not to another Sitecore item.

For example, if you want in a General Link fiel to add an anchor on an internal link to another Sitecore page the only way to do it is switching the presentation to raw values and adding it manually to the xml markup of the link, like this (using raw values):

Sample link without anchor:

<link text=” linktype=’internal’ class=” alt=”  querystring=” id='{110D559F-DEA5-42EA-9C1C-8A5DF7E70EF9}’ />

Link with anchor manually added:

<link text=” linktype=’internal’ class=” alt=”  querystring=” id='{110D559F-DEA5-42EA-9C1C-8A5DF7E70EF9}’ anchor=”myanchor” />

This is, of course, not really user-friendly. Therefore, if you want to have your anchor field back on this interface one option is to disable the new interface and Sitecore will use its old still available version for this dialog. You can do that by commenting out the following line in the Sitecore.Speak.Applications.config:

<!– <override dialogUrl=”/sitecore/shell/Applications/Dialogs/Internal%20link.aspx” with=”/sitecore/client/applications/dialogs/InsertLinkViaTreeDialog” /> –>

Your updated config file will look like this:

<?xml version="1.0" encoding="utf-8"?>
<configuration xmlns:patch="http://www.sitecore.net/xmlconfig/">
 <sitecore>
 <overrideXmlControls>
 <override xmlControl="Sitecore.Shell.Applications.Media.MediaBrowser" with="/sitecore/client/applications/Dialogs/SelectMediaDialog" />
 </overrideXmlControls>
<overrideDialogs>
 <!-- <override dialogUrl="/sitecore/shell/Applications/Dialogs/Internal%20link.aspx" with="/sitecore/client/applications/dialogs/InsertLinkViaTreeDialog" /> -->
 <override dialogUrl="/sitecore/shell/Applications/Dialogs/Mail%20link.aspx" with="/sitecore/client/applications/dialogs/InsertEmailDialog" />
 <override dialogUrl="/sitecore/shell/Applications/Dialogs/Anchor%20link.aspx" with="/sitecore/client/applications/dialogs/InsertAnchorDialog" />
 <override dialogUrl="/sitecore/shell/Applications/Item%20browser.aspx" with="/sitecore/client/applications/dialogs/InsertSitecoreItemViaTreeDialog" />
 <override dialogUrl="/sitecore/shell/Applications/Control%20panel.aspx" with="/sitecore/client/Applications/ControlPanel" />
 </overrideDialogs>

And your insert internal link interface will now look like this:

Capture

Anchor is back! Target Window is populated!

Hope that have helped you today.

Using MongoVUE to browse Sitecore xDB data

When working with Sitecore and xDB somtimes it is important to have tools to help you to understand what is going on behind the scenes. One of these tools is MongoVUE, which lets you browse the data from the Sitecore xDB collections in Mongo DB.

After you have it downloaded and installed you just need to enter the details about where you have you Mongo DB instance running. In my case I have it working on my localhost.

Capture

Once it is properly configured you can then now start browsing the Analytics database. Below I have the Jetstream Analytics db. MongoVUE provides us with a list of all available collections:

Capture

Let’s take a look on how interactions are captured. Interactions are saved in this collection every time a user visits your site. It can consist of one or many page views in the same interaction.

To visualize the interactions, right-click the collection Interactions and select View. In the image below we will notice that I have one of the interactions node expanded and we can see that 11 pages were visited:

Capture

It is interesting to note that although the visit ended at 1:31am the interaction was only saved about 10 minutes later. Technically the data was supposed to be saved on session end, but seems not to be the actual case. Therefore, when doing your tests, make sure to include some lag between the interactions and the data being actually saved to the xDB.

When we expand a Page view node we have the following information registered:

  • Date/Time
  • Duration
  • Items loaded
  • Page events: as for example a long running operation.
  • Sitecore device used
  • MvTests executed
  • URL
  • Visit page index

It is also interesting to see that any profile matches and the respective scores for each profile key are also saved.

Capture

As you guys can see, MongoVUE can be of excellent help to better understand how information is capture and organized by Sitecore within xDB collections. It is available for download at http://www.mongovue.com/downloads/ Hope that was helpful in case you are looking for tools like that.